Another super easy chicken recipe. Now that Colin and I have a freezer again, I've been stockpiling chicken recipes to match the stockpile of frozen chicken we keep on hand. Not sure how authentically "Asian" this one is, but it's tasty and I've made it four or five times this year. It does take a little bit of planning, since you have to let the chicken marinate for a bit. But after that step, it's easy peasy. Plus, I bet you have all the ingredients in your kitchen right this second.
Thai Honey Peanut Chicken
from Tasty Kitchen
Ingredients
1 lb chicken, cut into bite-size pieces
¼ cups soy sauce
2 tbsp honey
1 tbsp lime juice
1 tsp garlic (minced)
1 tbsp peanut butter (or go crazy and put in two or three)
½ tsp curry powder
1 tsp hot sauce (optional)
Directions
1. Mix ingredients and marinate chicken for 2-3 hours. I just toss everything in a gallon ziploc bag and put it in the fridge.
2. Pour the whole thing into a pan and cook it, over medium-high heat for 7-8 minutes or until chicken is done.
Friday, May 27, 2011
Wednesday, May 25, 2011
Lazy Chicken
This is one of the easiest dishes I have ever made. All you need is chicken (you don't even have to thaw it!) and whatever spices you have in your kitchen. Prep time is practically nil, and then you just let the chicken hang out in the oven for an hour.
It's the same idea as jerk chicken. Mix a bunch of spices together, apply like a dry rub, and bake.
Lazy Chicken
Ingredients
2 pounds chicken (frozen, thawed, fresh, what-have-you)6 tbsp assorted spices and/or herbs (I used chili powder, garlic powder, lemon-garlic chicken seasoning, ground ginger, oregano, salt, pepper... and probably a few other things)
Directions:
1. Preheat oven to 350 degrees.
2. Line broiler pan with aluminum foil, and cut slits to allow fat to drain.
3. Place chicken on pan, and top with spices and/or herbs. Pat it down like a dry rub.
4. Bake for an hour, until cooked. THAT'S IT!
Sunday, March 27, 2011
Pineapple Habanero Birthday Sorbet
You may have noticed the radio silence around here for the past three months. That is because, until yesterday, we had no refrigerator.
Right before Christmas, we woke up to room-temperature milk and OJ. The fridge was on, but not cold. We were getting ready to go out of town for ten days, and our budget was already blown on travel and Christmas presents, so we said "Screw it, we don't need a new fridge until January." The weekend after our trip, we did a little online window shopping and decided to get a new stove as well; it'd be nice to be able to cook something without the smoke detectors going off. The cost of a new stove and a new fridge meant we had to save up a bit before we could buy, because we didn't want to put it on credit. It was about 15 degrees outside, so we just put our milk, eggs, OJ, and beer in a cooler and put it out on the fire escape.
All was well and good, until it started getting up to 30, then 45 degrees. On the first day it actually hit 60, we knew it was seriously time to go get the fridge. After four weeks of back-order purgatory, our new appliances arrived!
Here they are, already broken-in with finger smudges, magnets, and bacon-grease.
The first thing I made in the new oven? My birthday cake! The first thing I made with the help of the fridge? Pineapple Habanero Sorbet.
1/2 habanero pepper, de-seeded and roughly chopped
1/3 cups water
1/3 cups light rum
3/4 cups sugar
Directions:
Blend all ingredients until smooth. Put in the ice cream maker your boyfriend's mom gave you for Christmas, but that you haven't been able to use for three months because you didn't have a freezer. Let sit for four hours.
Yields 1 quart.
Recipe from Thursday Night Smackdown.
Right before Christmas, we woke up to room-temperature milk and OJ. The fridge was on, but not cold. We were getting ready to go out of town for ten days, and our budget was already blown on travel and Christmas presents, so we said "Screw it, we don't need a new fridge until January." The weekend after our trip, we did a little online window shopping and decided to get a new stove as well; it'd be nice to be able to cook something without the smoke detectors going off. The cost of a new stove and a new fridge meant we had to save up a bit before we could buy, because we didn't want to put it on credit. It was about 15 degrees outside, so we just put our milk, eggs, OJ, and beer in a cooler and put it out on the fire escape.
All was well and good, until it started getting up to 30, then 45 degrees. On the first day it actually hit 60, we knew it was seriously time to go get the fridge. After four weeks of back-order purgatory, our new appliances arrived!
Here they are, already broken-in with finger smudges, magnets, and bacon-grease.
The first thing I made in the new oven? My birthday cake! The first thing I made with the help of the fridge? Pineapple Habanero Sorbet.
Pineapple Habanero Sorbet
Ingredients
3 cups fresh pineapple, chopped1/2 habanero pepper, de-seeded and roughly chopped
1/3 cups water
1/3 cups light rum
3/4 cups sugar
Directions:
Blend all ingredients until smooth. Put in the ice cream maker your boyfriend's mom gave you for Christmas, but that you haven't been able to use for three months because you didn't have a freezer. Let sit for four hours.
Yields 1 quart.
Recipe from Thursday Night Smackdown.
Thursday, December 9, 2010
Wacky Depression Cake
Notice anything missing from the ingredients I used to make a Chocolate Wacky Depression Cake? There's no eggs, no milk, and no butter! And yet, this is the moistest (most moist?) cake I have ever made. It keeps for days, and is not too sweet while still being chocolate-y. And yes, it calls for vinegar. Trust me, it all works out in the oven.
Chocolate Wacky Depression Cake
Ingredients
1 1/2 cups all-purpose flour1 cup white sugar
1/2 teaspoon salt (optional)
1 teaspoon baking soda
1/4 cup cocoa powder
6 tablespoons vegetable oil
1 tablespoon white vinegar
1 cup water
Directions:
1. Preheat oven to 350 degrees.
2. In a medium mixing bowl, mix all the dry ingredients together by hand. Add all the wet ingredients until well combined.
3. Pour into a 8×8 pan which has been prepared with non- stick spray.
4. Bake for 30 minutes until done. Allow to completely cool before serving. Top with frosting, a little powdered sugar, or leave plain. It's all good!
Recipe from Savory Sweet Life.
Sunday, December 5, 2010
Colin's Sunday Night Special: She-Crab Soup
Colin has started a habit of cooking on Sunday nights. Sticking with the soup theme, a few weeks ago he picked a She-Crab Soup recipe out of JoC. She-Crab Soup always makes us think of our second-favorite restaurant in Columbia: the Blue Marlin. After eating this soup, we decided to plan a day trip over Christmas just to go there for lunch (and also to see our friend Jackie of course!).
She-Crab Soup based on the recipe from Joy of Cooking
Ingredients
2 tbsp butter *see notes
2 tbsp flour
3 cups whole milk
1 lb lump crabmeat (picked over for shells)
1 tbsp dry sherry
1 tsp salt
1 tsp Worcestershire sauce
1/2 tsp hot sauce (to taste)
1/8 tsp ground mace *see notes
Yields
Not enough! This version made about three small bowls; maybe about 3 cups worth.
Directions
1. Start with a white roux: Melt the butter in a saucepan over low heat. Slowly mix in the flour, whisking constantly. Whisk and cook until the roux smells toasted but is not yet brown. You really can tell by smell when it's ready. You have to watch it and whisk all the time! As Paula Deen says, if the Publishers Clearinghouse knocks on your door, you holler at them to hold on a minute because you're in the middle of making a roux!
2. Remove the pan from heat and slowly whisk in the milk. Return to heat, bring to a simmer, and cook and whisk until thickened and smooth,.
3. Reduce heat to low and stir in the remaining ingredients. Heat gently and season to taste.
4. Garnish with chopped scallions if you're feeling fancy.
Colin's notes:
- Make sure to use high quality butter. We have a favorite Irish butter that we use on special occasions, and she-crab soup qualifies as special.
- You can also use a mix of cinnamon and nutmeg if you don't have mace (which is what we did).
- Be careful with your non-white ingredients. Don't go overboard on the Worcestershire sauce or you'll discolor the soup.
- Stick with lump crabmeat.
- Next time, we're going to triple the amount of milk and also add an additional 6 oz. can of crabmeat, in order to increase the yield.
Monday, November 29, 2010
Quick & Easy: Gnocchi with Alfredo Sauce
I've never been a pasta person. I skip spaghetti, pass on the lasagna, ignore ravioli... I don't even partake of macaroni and cheese. I'm a texture eater: I don't like anything too squishy, or slimy, or chewy, or grainy, or chunky. Something about pasta has always turned me off. And not only the texture of pasta, but the tomato sauce. In high school, on a school trip to Europe that included Spain, France, and Italy, I lied on my permission slip and wrote that I was allergic to tomatoes. So for the entire trip, while my classmates enjoyed authentic Italian pasta that was probably more delicious than anything I'll ever eat again, I was served white pizza. As my French teacher told a waiter when I tried to order grilled cheese off the kids' menu, "Elle est tres difficile."
I like to think I've grown out of my picky-ness, at least somewhat. At my friend Rachel's house last summer, I actually put some of the gnocchi and red sauce on my plate. Just a little bit, and I made sure to cover it with a pound of parmesan cheese. To my surprise, I liked it! Squishy little potato balls, and I went back for seconds.
So now gnocchi is the one pasta I know how to make. And it's incredibly easy: add the gnocchi to a pot of salted, boiling water. When they start to float, they're done. The end! Even I can do it. I can even open a jar of pasta sauce to eat it with. Unless, when I go to the fridge to grab the jar, it turns out the jar expired in April 2010. So what do you do when you have cooked gnocchi and no pasta sauce? Make alfredo! We had on hand some heavy cream, some butter, garlic, and of course the parmesean cheese. That's basically all alfredo sauce is. Combine the ingredients until it tastes good, then eat. Yum!
Thursday, November 18, 2010
Soup Season
It's cold. And we're the kind of people the hold out as long as possible to turn the heat on; not because we're of sturdy Norse stock or because of some perverse pride, but for the oh-so-humble reason of: we're cheap.
So what does one do when sticking to a budget but trying to stay warm? Soup! We've been on a soup kick for about a month now. It started on our vacation to Cape Cod back in October. We love the Cape in the fall. The scenery is beautiful, and there's hardly anybody around to spoil it. Even though we were on a vacation, we were still watching our wallets and trying to balance going out to eat with cooking at home. Enter this Garlic Soup recipe from Tasty Kitchen.
In the end, it tasted more like a slightly-garlicky, blended version of French Onion soup. It was tasty, but next time we'll be doubling the garlic. Colin and I are lucky to have each other, because it's important in a relationship to have equal levels of garlic tolerance. And ours are high :).
Garlic Soup
Ingredients
1 Tablespoon Olive Oil
1 cup Onions, Thinly Sliced
12 cloves Peeled Garlic, Smashed
1 cup Dry White Wine
1 quart Chicken Stock
1 leaf Bay
2 cups French Bread, Torn Into Pieces*
¾ cups Heavy Cream
½ cups Shredded Gruyere (or sharp white cheddar, if you're on a budget like us)
*note - the color of your bread will determine the color of your soup. French bread is not required. I used some homemade Sally Lunn bread so my soup came out medium brown rather than a lighter tan.
Yields
4 servings
Directions
1. Heat the oil in a large pot. Add onion and garlic. Cook over medium heat for 10 -12 minutes; the onion and garlic will begin to caramelize.
2. Add the wine, cover, reduce heat, and cook for 10 minutes, stirring occasionally. Add the stock and bay leaf.
3. Bring to a boil; reduce heat; cover and simmer for 30 minutes. Add the bread and allow the soup to sit without heat for 10 minutes. Remove the bay leaf.
4. In batches, pour the soup into the blender and puree until smooth. Add the cream and salt and pepper to taste. As each batch is pureed, pour into another pot. (Or, if you're lucky, use your immersion blender). Keep warm over low heat. Garnish with the cheese (if desired).
Serving alternative: Colin Version
Colin like chunky soups. So, I didn't blend the entire batch. He go half blended, half un-blended, topped with extra bread.
So what does one do when sticking to a budget but trying to stay warm? Soup! We've been on a soup kick for about a month now. It started on our vacation to Cape Cod back in October. We love the Cape in the fall. The scenery is beautiful, and there's hardly anybody around to spoil it. Even though we were on a vacation, we were still watching our wallets and trying to balance going out to eat with cooking at home. Enter this Garlic Soup recipe from Tasty Kitchen.
In the end, it tasted more like a slightly-garlicky, blended version of French Onion soup. It was tasty, but next time we'll be doubling the garlic. Colin and I are lucky to have each other, because it's important in a relationship to have equal levels of garlic tolerance. And ours are high :).
Garlic Soup
Ingredients
1 Tablespoon Olive Oil
1 cup Onions, Thinly Sliced
12 cloves Peeled Garlic, Smashed
1 cup Dry White Wine
1 quart Chicken Stock
1 leaf Bay
2 cups French Bread, Torn Into Pieces*
¾ cups Heavy Cream
½ cups Shredded Gruyere (or sharp white cheddar, if you're on a budget like us)
*note - the color of your bread will determine the color of your soup. French bread is not required. I used some homemade Sally Lunn bread so my soup came out medium brown rather than a lighter tan.
Yields
4 servings
Directions
1. Heat the oil in a large pot. Add onion and garlic. Cook over medium heat for 10 -12 minutes; the onion and garlic will begin to caramelize.
2. Add the wine, cover, reduce heat, and cook for 10 minutes, stirring occasionally. Add the stock and bay leaf.
3. Bring to a boil; reduce heat; cover and simmer for 30 minutes. Add the bread and allow the soup to sit without heat for 10 minutes. Remove the bay leaf.
4. In batches, pour the soup into the blender and puree until smooth. Add the cream and salt and pepper to taste. As each batch is pureed, pour into another pot. (Or, if you're lucky, use your immersion blender). Keep warm over low heat. Garnish with the cheese (if desired).
Serving alternative: Colin Version
Colin like chunky soups. So, I didn't blend the entire batch. He go half blended, half un-blended, topped with extra bread.
Friday, November 12, 2010
Apples.
Lots. of. apples.
Colin and I participated in the fall tradition of apple-picking this year, and came home with 72 apples.
What does one do with 72 apples? Have an apple-themed dinner party of course! On the menu: apple cider (natch), alcoholic and non-, provided by our friend Stefanie; apple and bacon polenta; apple crisp (made by Colin from his mother's recipe); and fried chicken made by Sean and salad made by his girlfriend Laura.
Baked Polenta with Apples, Gruyere, and Bacon
Ingredients
6 cups chicken stock
1 1/3 cups uncooked polenta
2 teaspoons minced fresh thyme
4 slices thick cut bacon
1 tablespoon butter
2 large Granny Smith apples (about 1 pound), cored and cut into 1/2-inch pieces
2 tablespoons brown sugar
1 tablespoon honey
1/4 teaspoon ground cinnamon
1/4 teaspoon grated orange peel
1 1/2 cups shredded Gruyere cheese
Yields
A baking-dish full, easily 8+ servings
Directions
1. Preheat oven to 325 degrees F.
2. Bring the 6 cups of chicken stock to a boil in a saucepan. Gradually whisk in the polenta. Reduce the heat to low and cook until the mixture thickens and the polenta is tender, stirring often, about 15 minutes. Turn off the heat and add in the thyme.
3. In a second pan, cook the bacon until desired texture is reached. Remove from the pan, pat dry of excess grease, and chop into 1/2-inch pieces. Add the butter to the pan over medium high heat until it begins to brown. Add the apples and saute until tender, about 9 minutes. Add all remaining ingredients EXCEPT cheese; stir to blend.
4. Add apple mixture, the bacon and one cup of the cheese to the polenta. Stir until well combined. Transfer mixture to a 13×9x2 inch oval dish (or something of similar capacity) that has been greased or coated with cooking spray. Top mixture with remaining cheese.
5. Bake until cheese is golden, about 30 minutes.
recipe from The Pink Apron
And what do you do when, even after all that, you still have 50 apples left? Apple butter! Apple butter is so simple, especially when using a crock pot. All it is is cooked-down applesauce. And all applesauce is is cooked down apples! Maybe add a little brown sugar or cinnamon, if that's your thing.
Just let it cook, stirring occasionally, until a wooden spoon can stand up on its own.
Then spread on homemade bread and enjoy.
Tuesday, October 12, 2010
Apple Sage Pork Chops
I never knew I was a pork girl until I looked at my bookmarked recipes and saw that I had more pork tags than beef or chicken! This was pretty easy to make, though it does require a little pan shuffle.
1 1/2 teaspoon ground sage
1 teaspoon minced garlic
1 teaspoon thyme
1/2 teaspoon ground allspice
1/2 teaspoon paprika
1/2 cup flour
1 teaspoon salt
4 pork chops, about 1-inch thick (about 1 1/4 pounds)
2 tablespoons olive oil, divided
1 medium onion, thinly sliced
1 red apple, thinly sliced
1 cup apple juice
1 tablespoon brown sugar
1/2 cup flour
1 teaspoon salt
4 pork chops, about 1-inch thick (about 1 1/4 pounds)
2 tablespoons olive oil, divided
1 medium onion, thinly sliced
1 red apple, thinly sliced
1 cup apple juice
1 tablespoon brown sugar
Directions
1. In a shallow bowl, mix together the flour, salt and the McCormick spices. Set aside 1 tablespoon of the flour-spice mixture in a separate bowl - you'll use this in the sauce later. Pat each pork chop in the flour mixture on both sides. Discard the rest of the flour-spice mixture.
2. Heat a larget skillet over high heat with just 1 tablespoon of the olive oil. When hot, add the pork chops and cook until browned on both sides. Remove the pork chops (they'll come back into the pan later for additional cooking). Wipe the skillet clean with a paper towel.
3. Heat the same skillet over medium heat with the remaining 1 tablespoon of the olive oil. When hot, cook the onions for 3 minutes. Add the apples and cook an additional 2 minutes. Push the apple/onions towards the outside of the pan, leaving an empty space in middle of pan. In the middle of pan, add apple juice, brown sugar and reserved flour-spice mixture. Whisk or stir until flour has disappeared.
4. Return the pork chops back into the pan, bring to a boil. Reduce heat to low, cover and simmer for 5 minutes or until pork chops just cooked through.
1. In a shallow bowl, mix together the flour, salt and the McCormick spices. Set aside 1 tablespoon of the flour-spice mixture in a separate bowl - you'll use this in the sauce later. Pat each pork chop in the flour mixture on both sides. Discard the rest of the flour-spice mixture.
2. Heat a larget skillet over high heat with just 1 tablespoon of the olive oil. When hot, add the pork chops and cook until browned on both sides. Remove the pork chops (they'll come back into the pan later for additional cooking). Wipe the skillet clean with a paper towel.
3. Heat the same skillet over medium heat with the remaining 1 tablespoon of the olive oil. When hot, cook the onions for 3 minutes. Add the apples and cook an additional 2 minutes. Push the apple/onions towards the outside of the pan, leaving an empty space in middle of pan. In the middle of pan, add apple juice, brown sugar and reserved flour-spice mixture. Whisk or stir until flour has disappeared.
4. Return the pork chops back into the pan, bring to a boil. Reduce heat to low, cover and simmer for 5 minutes or until pork chops just cooked through.
Wednesday, August 25, 2010
Corn on the Cob
Due to a picky-eater based childhood, I was never really into corn. Something about this summer (and the farmers' markets) has flipped the switch, and now, bam: I love corn on the cob. Here's how I make it, courtesy of In Praise of Leftovers:
Plain Jane Corn
So silly I’m telling you this, but somewhere along the line, I learned to cook corn this way, and nothing beats it. Put big old pot of water on the stove. Shuck your ears (or have your seven-year-old do it). Cut them in half if they won’t fit in the pot. Drop them in, and get the water to a boil. As soon as it boils, turn the water off, cover your pot, and let the corn sit for 10 minutes. Now it’s ready to eat, and not even a tad overcooked. Nothing worse than mushy corn. And if you have a grill going, you can throw it on there for a quick second for some smoke and grill marks. Oh–one more thing. Let your children completely annihilate whatever cube of butter happens to be in the butter dish. No sense trying to protect it. Slathering corn is its highest use, anyway.
Thursday, August 12, 2010
Watermelon Salad
Aha! An actual new blog post about an actual recipe I actually made!
I've made this watermelon salad at least half-a-dozen times this summer. I've been obsessed with watermelon, and this dish will only work if you've got a nice ripe one.
Ingredients
Half of a large watermelon (seedless if you can)
1 vidalia onion
1 bunch of mint
Balsamic vinegar
Olive Oil
Lemon or lime juice
Salt & pepper
Yields
5+ servings
Directions
1. Cut the watermelon into bite-size pieces. I've found the best way to do this is to do the same way you do an avocado: slice a grid then scoop out with a spoon.
3. Chop the mint. I like to roll mine up and then cut it with kitchen scissors, chiffonade-style, but you can chop it how you like.
Tastes good cold from the fridge, or room temp. Would also be good with basil instead of mint, or adding cucumbers or tomatoes.
I've made this watermelon salad at least half-a-dozen times this summer. I've been obsessed with watermelon, and this dish will only work if you've got a nice ripe one.
Ingredients
Half of a large watermelon (seedless if you can)
1 vidalia onion
1 bunch of mint
Balsamic vinegar
Olive Oil
Lemon or lime juice
Salt & pepper
Yields
5+ servings
Directions
1. Cut the watermelon into bite-size pieces. I've found the best way to do this is to do the same way you do an avocado: slice a grid then scoop out with a spoon.
(photo from Simply Recipes)
2. Slice the onion. I like mine sliced very thinly, almost translucent. You can do a rouch chop (guacamole style) if you'd like or if you don't have the patience.3. Chop the mint. I like to roll mine up and then cut it with kitchen scissors, chiffonade-style, but you can chop it how you like.
(photo from Wikipedia)
4. Dump the watermelon, onion, and mint in a serving bowl. Toss with a dash of balsamic, a splash of olive oil, two or three squirts of lemon juice, and a pinch of salt and pepper.Tastes good cold from the fridge, or room temp. Would also be good with basil instead of mint, or adding cucumbers or tomatoes.
Tuesday, August 10, 2010
Another new page!
I promise I will start posting actual recipes again soon. In the meantime, I've created a page for all the bookmarked recipes I've yet to try. Just click on the "Bookmarked Recipes" link in the menu bar or go to http://robynsrecipestotry.posterous.com/. It's still a work in progress, but I like having everything all in one place rather than bookmarked in a folder or starred in my gReader feed.
Monday, July 19, 2010
New page!
I'd like to share a little side project with you: Hoboken Eats, a restaurant blog/map/thing that we've started. Colin and I, along with our friend Sean, decided to keep track of which restaurants and bars we've been to. Despite being only a Mile Square, there are a ton of places to eat and drink in Hoboken. Here's hoping that sharing it with you will encourage us update it more often.
To see the map, simply click on the tab at the top of the page or click here.
Wednesday, July 7, 2010
Cooking with Gas
My new kitchen has a gas stove rather than an electrical one. I don't really care about gas vs. electric, but I do think gas heats up faster; sometimes too fast! Either that or I'm still getting used to my new stainless steel pans.
Also, see that yellow? Colin and I are not yellow people, and our whole apartment was various shades of it when we bought it nine months ago. We're not sure what color to do the kitchen, and will probably settle on white. It might be boring, but at least my food photos will stop getting a weird yellow cast all the time.
Wednesday, June 30, 2010
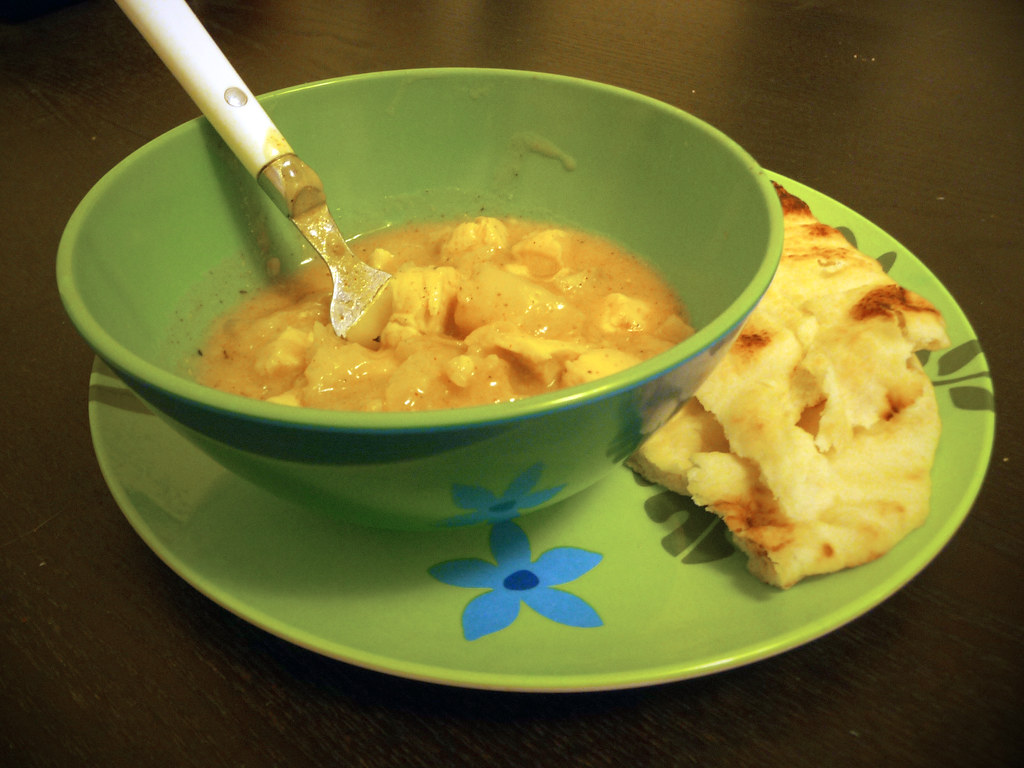
Quick Chicken Curry
This recipe comes from the Joy of Cooking. Colin gave me my copy of the 'bible' for Christmas two years ago, and despite the numerous food blogs I read every day (seriously, thirty seven and counting in my feed reader), I return to JoC time and again. Something about the thin pages, columns of text, and line drawings are so reassuring; it makes me feel like I'm a cook!
The Quick Chicken Curry recipe is one of the 'classic' recipes, and I think it could use some updating. It's not quick exactly (about 30 minutes, if your chicken is already cooked), but it's simple. The flavor doesn't quite stand up and needs a little tinkering. More pineapple? Fresh pineapple? Fresh ginger? More spice? As is, it's a fine go-to recipe, especially if your boyfriend went on a let's-make-pina-coladas-from-scratch kick and you've got most of the ingredients already on hand.
Ingredients
2 tbsp butter
1 large onion, chopped
2 tbsp flour
1 tbsp curry powder
1/2 tsp ground ginger
1/4 tsp ground cinnamon
1 (13.5 oz) can unsweetened coconut milk
1 1/4 c chicken broth
1 (8 oz) can crushed pineapple with juice
2 to 3 c cooked chicken (or turkey)
Salt & pepper
Yields
4+ servings
Directions
1. Melt butter in a saucepan over medium heat, adding the onions and cooking until translucent (about 7 minutes)
2. Add flour, curry, ginger, and cinnamon to the onions, and stir it all together as best you can (it should be pretty paste-y).
3. Remove the pan from heat and whisk in the coconut milk, chicken broth, and pineapple.
4. Put the pan back on the heat and bring to a boil, stirring 'constantly' until the sauce reduces to a nice thick consistency. I say 'constantly,' because really, are you gonna stand over a hot stove for 10 full minutes? Or are you going to stir a bit, then go update Twitter, stir a bit, then start the rice, stir a bit, then check the baseball scores, stir a bit? I thought so. Your sauce will survive.
5. Add your diced chicken and let cook on low for a few more minutes. I also tossed in (already cooked) potatoes, since our favorite curry at Rearn Thai has potatoes in it. Season to taste with salt and pepper.
6. Serve with cooked white rice or naan (pictured).
Recipe from Joy of Cooking, photo from me.
Printable version of this recipe
The Quick Chicken Curry recipe is one of the 'classic' recipes, and I think it could use some updating. It's not quick exactly (about 30 minutes, if your chicken is already cooked), but it's simple. The flavor doesn't quite stand up and needs a little tinkering. More pineapple? Fresh pineapple? Fresh ginger? More spice? As is, it's a fine go-to recipe, especially if your boyfriend went on a let's-make-pina-coladas-from-scratch kick and you've got most of the ingredients already on hand.
Ingredients
2 tbsp butter
1 large onion, chopped
2 tbsp flour
1 tbsp curry powder
1/2 tsp ground ginger
1/4 tsp ground cinnamon
1 (13.5 oz) can unsweetened coconut milk
1 1/4 c chicken broth
1 (8 oz) can crushed pineapple with juice
2 to 3 c cooked chicken (or turkey)
Salt & pepper
Yields
4+ servings
Directions
1. Melt butter in a saucepan over medium heat, adding the onions and cooking until translucent (about 7 minutes)
2. Add flour, curry, ginger, and cinnamon to the onions, and stir it all together as best you can (it should be pretty paste-y).
3. Remove the pan from heat and whisk in the coconut milk, chicken broth, and pineapple.
4. Put the pan back on the heat and bring to a boil, stirring 'constantly' until the sauce reduces to a nice thick consistency. I say 'constantly,' because really, are you gonna stand over a hot stove for 10 full minutes? Or are you going to stir a bit, then go update Twitter, stir a bit, then start the rice, stir a bit, then check the baseball scores, stir a bit? I thought so. Your sauce will survive.
5. Add your diced chicken and let cook on low for a few more minutes. I also tossed in (already cooked) potatoes, since our favorite curry at Rearn Thai has potatoes in it. Season to taste with salt and pepper.
6. Serve with cooked white rice or naan (pictured).
Recipe from Joy of Cooking, photo from me.
Printable version of this recipe
Wednesday, June 23, 2010
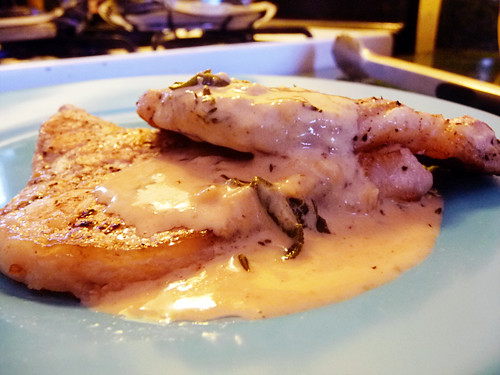
Pork with Camembert Sauce
Fancy but easy.
Ingredients
1 lb pork medallions
1 tbsp butter
3 tbsp dry white wine
3/4 c whipping cream/crème frâiche
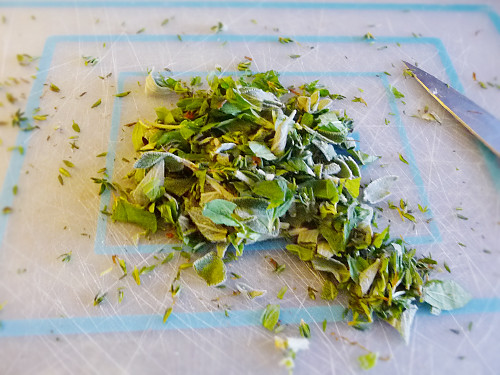
1 tbsp fresh herbs (marjoram, thyme, sage, rosemary, etc)
4 oz. Camembert cheese (or Brie or other creamy cheese)
1 1/2 tsp Dijon mustard
Pepper
Serves
2-3 people
2-3 people
Directions
1. Melt butter in frying pan over medium-high heat, then add the meat. Cook, turning once, for about 5 minutes. Remove and keep warm.2. Meanwhile, chop herbs.
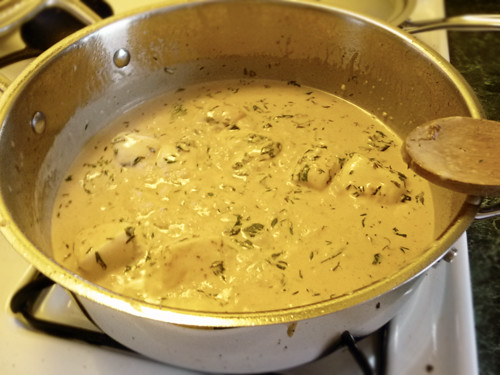
3. Add wine to the pan drippings, and bring to a boil, scraping the bottom of the pan to get all the porky goodness. Stir in the cream and herbs and bring back to a boil.
4. Add the cheese and mustard, as well as any juices accumulated from the meat. Stir until the cheese melts, adding more cream/seasoning as needed. Try not to eat the sauce by the spoonful.
Recipe from Cook's Encyclopedia of 30-Minute Cooking; photos from me.
Tuesday, June 22, 2010
I'm back!
As some of you know, I recently moved 500 miles from North Carolina to Hoboken, New Jersey. I've got a new kitchen, a new cute red-headed roommate, and a backlog of cooking projects to post. I've settled in, cleaned house, and finally found a card reader to get my pics off the camera and onto the blog. Get ready!
Wednesday, March 10, 2010
Tiramisu Pancakes
I love tiramisu. I love pancakes. And I almost died when I stumbled across this recipe. Can't wait to try it!
Tiramisu Pancakes
recipe & photos from Ivory Hut
(Serves about 5 reasonably hungry people)
For the pancakes:
2 cups all-purpose flour
2 tablespoons sugar
2 tablespoons cocoa powder, slightly rounded, sifted
2 teaspoons baking powder
1/2 teaspoon baking soda
a generous pinch of salt
1 1/2 cups milk
1/2 cups sour cream
3 large eggs
4 tablespoons butter, melted
2 teaspoons vanilla
2 tablespoons instant coffee
For the glaze (optional):
1/4 cup maple syrup
3 tablespoons softened butter
2 tablespoons coffee liqueur
For the cream:
4 oz. mascarpone cheese
1 cup whipping cream
2 tablespoons coffee liqueur
2 tablespoons maple syrup
Instructions:

Start by preparing the cream and the glaze. For the cream, beat all ingredients together and whip until you have soft peaks. Set aside in the refrigerator. (Tip: this cream tastes amazing, and is what really makes these pancakes. If you like generous amounts of cream on your pancakes, you might want to make a double portion.) The glaze is optional, but very, very (and I mean very) good. Simply combine the ingredients well. Set aside.

In a medium bowl, combine the flour, sugar, cocoa powder, baking powder, baking soda, and salt. Make sure the cocoa powder is well sifted, so that it will dissolve evenly.

In a separate bowl, combine the milk and sour cream until smooth (it helps to slowly dilute the sour cream with the milk while whisking, which reduces the chances of clumps). Add the instant coffee powder and mix well until dissolved. Whisk in the eggs, melted butter, and vanilla. Add the wet mixture to the dry ingredients, mixing gently until you have a slightly lumpy batter but without any large clumps of flour. If batter is a little runny, add a tablespoon or two of flour.I like to transfer my batter to a measuring cup or something else with a spout, for easier cooking.
Let the batter sit while you preheat your griddle. When griddle is hot, drop batter in portions desired (1/4 cup for regular-sized pancakes) onto the greased griddle. When bubbles come up and edges look cooked, gently flip to cook the other side. Once pancakes are cooked, transfer to a plate.

Spread a small amount of the maple glaze over the top of the pancake so it soaks in while still hot. Continue with the remaining batter until done.

To serve, dollop a generous amount of the cream in between layers of pancakes. Top with more cream, and then top with shaved chocolate, or a light dusting of sifted cocoa powder.
Serve with extra cream and/or glaze on the side for dipping. A bonus: these pancakes taste amazing even when cold.
recipe & photos from Ivory Hut
Tiramisu Pancakes
recipe & photos from Ivory Hut
(Serves about 5 reasonably hungry people)
For the pancakes:
2 cups all-purpose flour
2 tablespoons sugar
2 tablespoons cocoa powder, slightly rounded, sifted
2 teaspoons baking powder
1/2 teaspoon baking soda
a generous pinch of salt
1 1/2 cups milk
1/2 cups sour cream
3 large eggs
4 tablespoons butter, melted
2 teaspoons vanilla
2 tablespoons instant coffee
For the glaze (optional):
1/4 cup maple syrup
3 tablespoons softened butter
2 tablespoons coffee liqueur
For the cream:
4 oz. mascarpone cheese
1 cup whipping cream
2 tablespoons coffee liqueur
2 tablespoons maple syrup
Instructions:
Start by preparing the cream and the glaze. For the cream, beat all ingredients together and whip until you have soft peaks. Set aside in the refrigerator. (Tip: this cream tastes amazing, and is what really makes these pancakes. If you like generous amounts of cream on your pancakes, you might want to make a double portion.) The glaze is optional, but very, very (and I mean very) good. Simply combine the ingredients well. Set aside.
In a medium bowl, combine the flour, sugar, cocoa powder, baking powder, baking soda, and salt. Make sure the cocoa powder is well sifted, so that it will dissolve evenly.
In a separate bowl, combine the milk and sour cream until smooth (it helps to slowly dilute the sour cream with the milk while whisking, which reduces the chances of clumps). Add the instant coffee powder and mix well until dissolved. Whisk in the eggs, melted butter, and vanilla. Add the wet mixture to the dry ingredients, mixing gently until you have a slightly lumpy batter but without any large clumps of flour. If batter is a little runny, add a tablespoon or two of flour.I like to transfer my batter to a measuring cup or something else with a spout, for easier cooking.
Let the batter sit while you preheat your griddle. When griddle is hot, drop batter in portions desired (1/4 cup for regular-sized pancakes) onto the greased griddle. When bubbles come up and edges look cooked, gently flip to cook the other side. Once pancakes are cooked, transfer to a plate.
Spread a small amount of the maple glaze over the top of the pancake so it soaks in while still hot. Continue with the remaining batter until done.
To serve, dollop a generous amount of the cream in between layers of pancakes. Top with more cream, and then top with shaved chocolate, or a light dusting of sifted cocoa powder.
Serve with extra cream and/or glaze on the side for dipping. A bonus: these pancakes taste amazing even when cold.
recipe & photos from Ivory Hut
Subscribe to:
Posts (Atom)