Showing posts with label i made this. Show all posts

Friday, May 27, 2011

Somewhat Asian Chicken

Another super easy chicken recipe. Now that Colin and I have a freezer again, I've been stockpiling chicken recipes to match the stockpile of frozen chicken we keep on hand. Not sure how authentically "Asian" this one is, but it's tasty and I've made it four or five times this year. It does take a little bit of planning, since you have to let the chicken marinate for a bit. But after that step, it's easy peasy. Plus, I bet you have all the ingredients in your kitchen right this second.


Thai Honey Peanut Chicken
from Tasty Kitchen

Ingredients
1 lb chicken, cut into bite-size pieces
¼ cups soy sauce
2 tbsp honey
1 tbsp lime juice
1 tsp garlic (minced)
1 tbsp peanut butter (or go crazy and put in two or three)
½ tsp curry powder
1 tsp hot sauce (optional)


Directions
1. Mix ingredients and marinate chicken for 2-3 hours. I just toss everything in a gallon ziploc bag and put it in the fridge.
2. Pour the whole thing into a pan and cook it, over medium-high heat for 7-8 minutes or until chicken is done.


Wednesday, May 25, 2011

Lazy Chicken

This is one of the easiest dishes I have ever made. All you need is chicken (you don't even have to thaw it!) and whatever spices you have in your kitchen. Prep time is practically nil, and then you just let the chicken hang out in the oven for an hour.

It's the same idea as jerk chicken. Mix a bunch of spices together, apply like a dry rub, and bake. 

Lazy Chicken

Ingredients
2 pounds chicken (frozen, thawed, fresh, what-have-you)
6 tbsp assorted spices and/or herbs (I used chili powder, garlic powder, lemon-garlic chicken seasoning, ground ginger, oregano, salt, pepper... and probably a few other things)

Directions:
1. Preheat oven to 350 degrees.
2. Line broiler pan with aluminum foil, and cut slits to allow fat to drain.
3. Place chicken on pan, and top with spices and/or herbs. Pat it down like a dry rub.
4. Bake for an hour, until cooked. THAT'S IT!

Wednesday, June 30, 2010

Quick Chicken Curry

This recipe comes from the Joy of Cooking. Colin gave me my copy of the 'bible' for Christmas two years ago, and despite the numerous food blogs I read every day (seriously, thirty seven and counting in my feed reader), I return to JoC time and again. Something about the thin pages, columns of text, and line drawings are so reassuring; it makes me feel like I'm a cook!

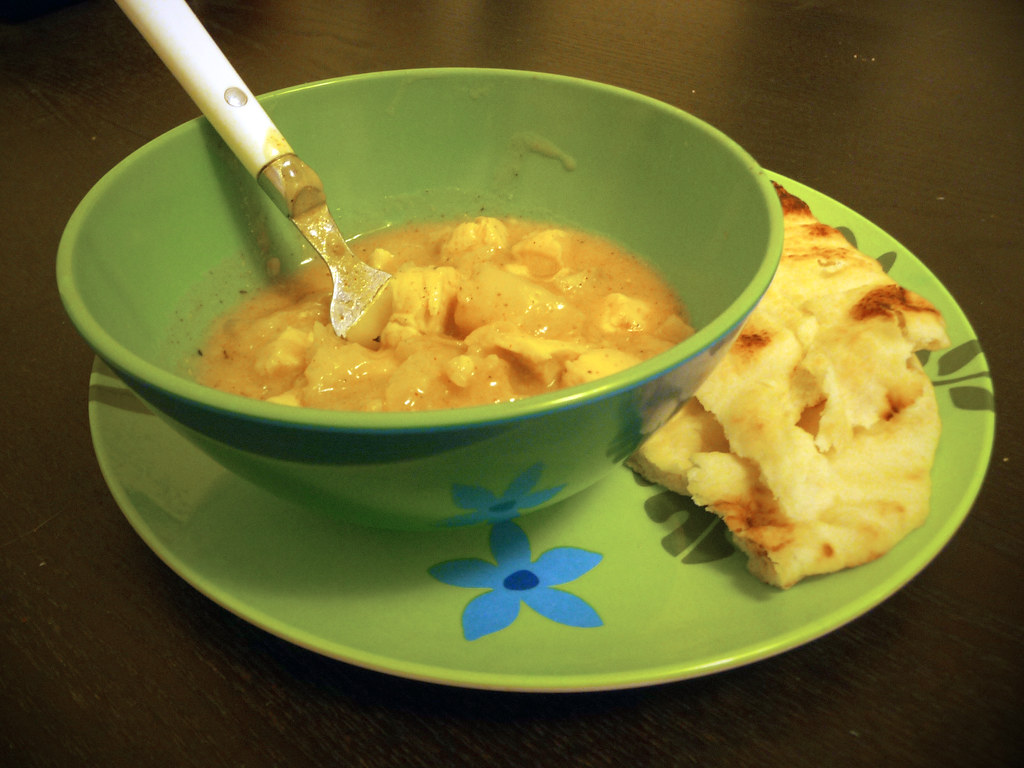
The Quick Chicken Curry recipe is one of the 'classic' recipes, and I think it could use some updating. It's not quick exactly (about 30 minutes, if your chicken is already cooked), but it's simple. The flavor doesn't quite stand up and needs a little tinkering. More pineapple? Fresh pineapple? Fresh ginger? More spice? As is, it's a fine go-to recipe, especially if your boyfriend went on a let's-make-pina-coladas-from-scratch kick and you've got most of the ingredients already on hand.


Ingredients
2 tbsp butter
1 large onion, chopped
2 tbsp flour
1 tbsp curry powder
1/2 tsp ground ginger
1/4 tsp ground cinnamon
1 (13.5 oz) can unsweetened coconut milk
1 1/4 c chicken broth
1 (8 oz) can crushed pineapple with juice
2 to 3 c cooked chicken (or turkey)
Salt & pepper

Yields
4+ servings

Directions
1. Melt butter in a saucepan over medium heat, adding the onions and cooking until translucent (about 7 minutes)
2. Add flour, curry, ginger, and cinnamon to the onions, and stir it all together as best you can (it should be pretty paste-y).
3. Remove the pan from heat and whisk in the coconut milk, chicken broth, and pineapple.
4. Put the pan back on the heat and bring to a boil, stirring 'constantly' until the sauce reduces to a nice thick consistency. I say 'constantly,' because really, are you gonna stand over a hot stove for 10 full minutes? Or are you going to stir a bit, then go update Twitter, stir a bit, then start the rice, stir a bit, then check the baseball scores, stir a bit? I thought so. Your sauce will survive.
5. Add your diced chicken and let cook on low for a few more minutes. I also tossed in (already cooked) potatoes, since our favorite curry at Rearn Thai has potatoes in it. Season to taste with salt and pepper.
6. Serve with cooked white rice or naan (pictured).

Recipe from Joy of Cooking, photo from me.
Printable version of this recipe
Wednesday, June 23, 2010

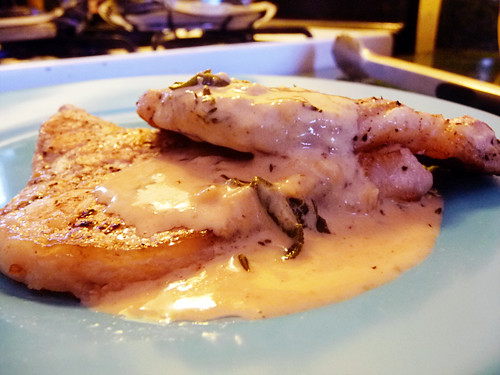
Pork with Camembert Sauce

Fancy but easy.


Ingredients
1 lb pork medallions
1 tbsp butter
3 tbsp dry white wine
3/4 c whipping cream/crème frâiche
1 tbsp fresh herbs (marjoram, thyme, sage, rosemary, etc)
4 oz. Camembert cheese (or Brie or other creamy cheese)
1 1/2 tsp Dijon mustard
Pepper

Serves
2-3 people

Directions
1. Melt butter in frying pan over medium-high heat, then add the meat. Cook, turning once, for about 5 minutes. Remove and keep warm.

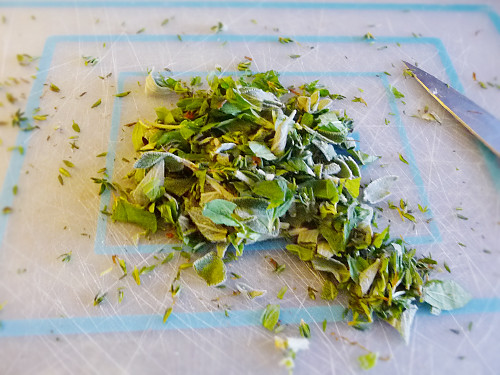
2. Meanwhile, chop herbs.


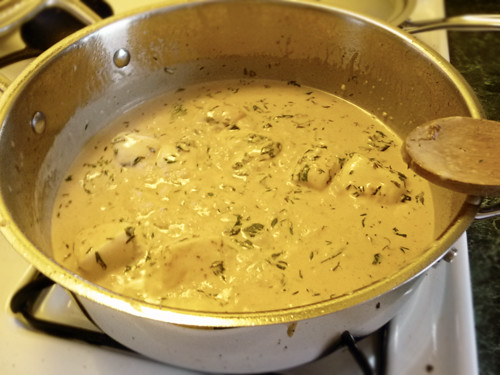
3. Add wine to the pan drippings, and bring to a boil, scraping the bottom of the pan to get all the porky goodness. Stir in the cream and herbs and bring back to a boil.

4. Add the cheese and mustard, as well as any juices accumulated from the meat. Stir until the cheese melts, adding more cream/seasoning as needed. Try not to eat the sauce by the spoonful.


5. Serve over the pork and enjoy!


Recipe from Cook's Encyclopedia of 30-Minute Cooking; photos from me.

Wednesday, February 24, 2010

Chocolate Chip Cookies: The Revelation

You know how sometimes, you didn't know what it was you were looking for until you found it? These cookies are exactly what I want in a chocolate chip cookie, but never knew: soft, pillowy, chewy goodness. These cookies aren't going to satisfy everyone, as they don't have your conventional chocolate chip cookie texture. These are almost muffin like, very puffy, with no crunch. The secret ingredient? Applesauce!

Ingredients
1 1/2  cups  all-purpose flour
1 1/2  teaspoons  baking powder
3/4  teaspoon  salt
1/2  cup  applesauce
1  cup  packed brown sugar
1/4  cup  butter, softened
1  tablespoon  vanilla extract
1  large egg
1  cup  (or more) semisweet chocolate chips

Yields approx. 2 dozen

Directions
1. Preheat oven to 375°.
2. Combine flour, baking powder, and salt in a small bowl; stir well with a whisk.
3. Combine applesauce, sugar and butter; beat with a mixer at medium speed until light and fluffy (about 2 minutes)*. Beat in vanilla and egg. Add flour mixture; beat at low speed until well-blended. Fold in chips.
4. Drop by level tablespoons 2 inches apart onto baking sheets coated with cooking spray**. Bake at 375° for 10 minutes or until almost set. Cool on pan 2 to 3 minutes or until firm. Remove cookies from pan; cool on wire racks.
*I didn't feel like breaking out my hand mixer, and just combined everything with a good ol' wooden spoon.
**These cookies are STICKY. They even stuck to my wonderful Silpat mats. Trust me, you need the cooking spray.


By request! A printable version of this recipe.

Sunday, February 14, 2010

Chocolate Guinness Cupcakes with Irish Cream Frosting

Guinness cupcakes are the perfect cupcakes if you don't like deserts that are overly sweet. The cupcakes are nice and moist, and chocolately without being cloyingly sugary. The frosting is probably my new favorite frosting - irish cream goes really well as a frosting flavor. It's similar to vanilla but with slightly more complex flavor.

Ingredients
For the cupcakes
1 (12-ounce) bottle Guinness stout
1/2 cup milk
1/2 cup vegetable oil
1 tablespoon vanilla extract
3 large eggs
3/4 cup sour cream
3/4 cup unsweetened cocoa, plus more for garnish
2 cups sugar
2 1/2 cups all-purpose flour
1 1/2 teaspoons baking soda
A pinch of salt

For the frosting
1 stick of unsalted butter, softened
3-4 cups of powdered sugar (as needed)
3-4 tablespoons of Irish Cream (Baileys) and/or milk (as needed)
A pinch of salt
Yields: around 40 cupcakes (a lot!)

Directions
1.  Preheat the oven to 350°F.
2.  In a large mixing bowl, combine the Guinness, milk, vegetable oil, and vanilla. Beat in the eggs, one at a time. Mix in the sour cream. Feel free to sip on a spare Guinness.
3.  In a large mixing bowl, whisk together the cocoa, sugar, flour, baking soda, and salt. Gradually mix the dry ingredients into the wet Guinness mixture.
4.  Line and grease your muffin tin and divide the batter among the muffin tins. I lay aluminum foil over my tin, then poke holes over the cups and then insert my liners, then spray. This keeps any batter that spills from baking onto my muffin tin.
I also like the use a ladle to distribute my mixture. Keeps things from getting too messy.

5.  Bake 25 minutes, until risen and set in the middle but still soft and tender. Cool before turning out of the tins.

While your cupcakes are cooling, start on the frosting.

Cream your softened butter and irish cream, and gradually add the powdered sugar. I used about 3.5 cups, plus a splash or two of skim milk, to get the consistency I liked. I also recommend a pinch of salt - a little salt helps tone down the toothache sweetness of the frosting.

You should have enough frosting to cover all of your cupcakes generously - no need to skimp! If you want to mail them to a cute redheaded boy, I recommend the shoebox method. Refrigerate overnight so the frosting doesn't stick to everything, then mail.

Sunday, January 31, 2010

Cheese

I got a wonderful Christmas present from Mama Fink (C's mom). It's beautiful. Glorious even.


A six-sided box grater. Just like Alton Brown has! It''s magnificent. I will never go back to regular plane graters again. This one has four grades of graters, from fine to extra large (which I bet would be great for hashbrowns),  plus two grades of zesters.

My first use of my new grater was to shred eight ounces of cheddar to make a Saturday afternoon snack of Welsh Rarebit.


It was all I could do to stop myself from sticking a fork in and eating it straight.

Here it is piled high in the pot:


As you can see, this is clearly enough cheese sauce to feed an army. I only needed about a quarter of a cup to go over my toast. Luckily, the sauce is easily refrigerated, and goes well with biscuits on Sunday morning.

Tuesday, January 26, 2010

Banana 'Ice Cream'

This is so simple, yet so tasty, and you won't believe it until you try it.


Ingredient
Bananas

(yep, that's it!)

Directions
Slice up a banana or two, then freeze it.


I've found it's easier to slice then freeze, since cutting a frozen banana isn't easy. It'll take a few hours for your slices to freeze. I usually let mine go overnight.


Whip out your trusty Magic Bullet or blender.


Toss in your bananas and blend.


You can dribble in a tiny bit of milk or vanilla or cream if you want, but your bananas, after a minute or so, will come out looking like this:


Unless, of course, your Magic Bullet dies. Which mine finally did, right in the middle of banana-ice-cream-making magic. The above picture is a screen shot from months ago when I first tried this recipe.

So what's a girl with a broken Magic Bullet and no blender and a serious craving for banana ice cream supposed to do?

She gets creative. And out comes the hand mixer. And guess what? It worked!


A blender is still ideal, to get the ultimate creaminess. Seriously, it gets to the exact texture of soft-serve ice cream.


You can even store it in the freezer, then later serve it to your guests at a dinner party and make them guess the ingredients. Or ingredient.

Or you can add some mini chocolate chips and gobble the whole thing. What? It's just bananas! It's good for you!


Wednesday, January 6, 2010

Homemade Vanilla Extract

Now that Christmas has come and gone (and then some), I can finally reveal a little project I've been working on: homemade vanilla extract. Back in November, I was searching for easy, homemade gifts to give at Christmas. Cookie mix, limoncello, granola ... vanilla seemed the easiest, the cheapest, and the prettiest.

Ingredients/Supplies
Vanilla Beans
Vodka
Containers

The ratio is 2-3 beans per 6-8 ounces vodka.

I found my beans at Beanilla.com. I ordered the variety pack, and received a bunch of different kinds - Indonesian, Mexican, Indian, etc. Cost: $25.


For the containers, I hit up an old favorite: American Science & Surplus! Cost: $15.


As for the liquor, I wanted something not too expensive but not tasting of gasoline - Skyy Vodka. Cost: $20. I read that you can substitute other liquors as well. I bet rum and bourbon would both work.


Directions
Places two beans in each container, and fill with vodka. Seal and let sit in a cool place for 8 weeks.

That's it!


I made 12 bottles to give away. They make good gifts for moms, aunts, and hostesses. Plus one for me.


(This picture is on day one. You want them to darken up a bit before using.)

Total cost: $60 / 12 bottles =  only $5 each!

I even went one step further and made labels. I went for an old-timey "Dr. Fantastik's Amazing Liquer" look.


I got a lot of compliments on this idea,  but don't know if anyone has used theirs yet (including me). At least they look good!

Sunday, December 20, 2009

Tyler Durden Chicken

This recipe is from All Bower Power. It's called Tyler Durden Chicken because in their version, they make it super spicy. My version is less spicy, and kind of changes every time I make it.

Let's start off with this:


Normally, I would never be suckered into a product packaged in individualized portions. Why not just buy generic store-brand chicken breasts, then wrap them in plastic wrap myself? But this was on sale, you guys! And it was calling out to me and me single-mouth household. This is a serious issue around here, because when you are only feeding one person, you have to go through ingredients before they spoil. So while something could serve a family of four or five for one meal, at my house it means having the same thing for lunch and dinner every day for a week. With this 'perfect portions' chicken, I can pull out just one serving to defrost at a time, and the rest can stay frozen for weeks. Also it was on sale. Did I mention that already?

Back to Tyler Durden Chicken:

Ingredients
Chicken
Butter
Seasoning
Garlic (real or powdered)
Cayenne/Red Pepper/Chili Powder/What have you
Orange Juice


Directions
1. Toss some butter in a pan and get it going. Meanwhile, chop up your chicken into bite size pieces.
2. Add your chicken to the pan. I like to add my seasonings at this juncture - salt, pepper, chicken seasoning, garlic powder, cayenne, or whatever you like.
3. After the chicken cooks for a minute or so, pour in the OJ. I pour about 2/3rds of the way up the chicken.


4. Cook that sucker on medium high. Stir it occasionally.
5. Let the orange juice cook down until it's nice and goopey. This may take awhile. If you are impatient, start with orange juice concentrate instead of regular orange juice. I've found a good balance is partially watered-down concentrate, but either way will work. You're good to go when it looks like this:


You can serve it with rice, or a salad, or you can be lazy like me and eat it alone. Enjoy!


Monday, December 14, 2009

Candy Cane Cookies

It's that time of year - time for Christmas cookies.

My family doesn't really have any family recipes, but this is one of the few. My mom made these cookies with her family when she was a kid, and then made them with my brothers and me when we were kids. And here's where the cookies become infamous: one year, my youngest brother Jeff got a bit overzealous with the raw cookie dough. Let's just say the now, years later, he still gets a bit green around the gills when he smells almond extract. I still love them, though. They're easy to make, pretty to look at, and mildly sweet. Why we use almond extract and not peppermint I don't know, but trust me, they taste delicious.


Ingredients

1 c. shortening
1 c. sifted confectioner's sugar
1 egg
1 ½  tsp almond extract
1 tsp vanilla
2 ½ cups flour
1 tsp salt
Red food coloring


Directions

1. Mix together your wet ingredients - shortening, egg, vanilla, almond, and sugar. I recommend an extra-large egg, because the dough can be a bit dry. 
2.  Sift in the flour and salt.

If your dough is a little crumbly, you can mix in a smidge of water. You want your dough to have the consistency of playdough. I added water because mine came out like this:


3. Once your dough is mixed, remove half and place in plastic wrap in the fridge (make a giant dough ball). Take your remaining half and add red food dye until you get a nice pink color. Put this in plastic in the fridge as well.

4. Clean up the red food dye you invariably got all over your hands, counter, and the cat.
5. After at least one hour or overnight, break out your dough balls (heh).
6. Roll out some 'worms' the thickness of your pinky.


7. Twist them together, the roll a bit to get them joined.


Then place on a cookie sheet and shape like a candy cane.


7a. Alternate method - the marble. Roll two pieces of dough into a ball, then roll into your worm shape.


8. Repeat. Repeat. Repeat.


9. Bake at 375 degrees for 9-12 minutes. These cookies don't really puff, so you can place them fairly close to each other on your cookie sheet. They also don't brown too much, and will come out looking pretty much how they looked when you put them in.

Yields about 4 dozen. Last approx. 4 hours until they're hoovered.